Thursday, May 29, 2025

Getting Inky with Clean & Simple Workshop


Here I am at the end of my Altenew Educator Certification journey that began March 2024. I kept seeing so many posts with Altenew Certified Educator by the creator’s names and out of curiosity I had to know more about what this was. I discovered Altenew’s Educator Certification Program (AECP). This seemed like a great opportunity to learn new things, renew old ideas & techniques, and to force me to create, sometimes outside of my comfort zone.

The past year went by so quickly to get to this final project to complete level 3 of the program. And I look forward to seeing where I go from here. The level 3 final project requires you to plan and teach an in-person or a live “virtual” workshop. I somehow managed to find myself trying to figure out how to teach a combination of both types of workshops…go big or go home…right?! Thanks to the help of my husband and our son, I somehow managed to pull it off and make it work for both arenas.

My planning started over a month ago when I was given the go ahead from Erum after I completed all 3 levels of AECP which involves completing 25 Altenew Academy courses and 2 final projects. Twenty (20) of which they are assigned and five (5) that you choose.
Planning started with designing 2 projects that could be completed within a 2-hour time frame. Once I decided on and created my 2 cards, I then had to write up a plan, supply list, and instructions. These needed to be approved by Erum before I could proceed. While waiting for her approval, using Canva I designed an invitation to share in the AECP and Altenew Fan Facebook Groups.


After receiving the go ahead, over the next several weeks I emailed the supply list, instructions, and Zoom link to all of the participants. In the meantime, my husband and our son made sure I had everything set up and working on the technical side. To make it possible to teach both virtual and in-person we had to setup a television and run Zoom on my husband’s laptop for the in-person attendees to be able to see what I was doing while still being able to share my desktop to the online group. 
 
A couple of things I learned:

1.  Make sure the you have a stable surface and a sturdy tripod to hold your cameras.
2.  One thing I did learn on the technical side; if you are using different devices; is to have the front facing camera and your device that shows everyone in the same area. Because of the set up we used my laptop was off to the side of where my front facing camera was and so even though I was looking at the participants when they were speaking it appeared that I was looking off somewhere else.
3.  READ your written plan and instruction while you are teaching the technique or project. Thinking I had it down left me reversing a couple of my steps and while it still worked it could have been confusing for new crafters.
4.  Practice teaching your projects even if that means roping a relative in to learn to make the projects. My husband was a huge help in being my guinea pig student and was also able to help the in-person participants.

Joe (my husband)

5.  Have your supplies organized and close at hand to make the time flow easily without interruptions.
6.  Just enjoy the time and the process.

Card #1

This first card focused on using ink sprays, splatter, ink blending and stencils to create depth and dimension to our background panels. This is the getting inky part of the card. We then embossed a stamped image over top of the background and added a simple sentiment strip across the front for a clean and simple style card.

My card uses the retired Altenew Color Block Triangle Stencil and Paint-A-Flower: Sweet Pea stamp set. There are so many great stencils that could be used for this technique. It just needs to have larger openings in the design.

Card #2

The second card featured ink smooshing and splatters over a heat embossed background image to again create an inky, grungy style background while keeping the layout of the card clean and simple with a simple strip sentiment and some sequins. Again, focusing on getting depth and dimension to the background.

For this card I used Altenew Shine Like a Diamond background stamp and Altenew One-Go Solid Sentiment Press Plate.

Sample Cards


The sample cards were created during a practice run or from "throwaway" panels that were made while trying to come up with my card design for this workshop. I forced myself to turn them into cards even though I may not have liked the panel so that I could share with the participants that not all of your panels turn out as you expect but don't toss them out find a way to bring some life to them.

It was a pleasure to craft with all of my workshop attendees! I thank you each for volunteering your time to attend my workshop and I hope everyone got a little something from it. All of the cards my participants create are just fantastic!! I could not have asked for better.

Workshop Participants

Walter Zemrock

Ishani S
Quillish

Jasmine (in person)

Mackenzie (in person)


Jerralyn Rose

Kimberly Whitten

Thank you to Altenew for this opportunity to find another avenue to share my creativity. And I hope to continue to move forward with what I have learned in each of the classes as well as what I learned in the process of planning and executing my final project.


Friday, May 23, 2025

Orchids...My Favorite Flowers

Orchids are my favorite flower. They are so pretty and delicate. No matter how many times I try I do not have the knack for growing them. So when I saw this Orchid Expressions set by Papertry Ink I knew I had to have it.


Layering stamps are a huge struggle for me for some reason so I am very happy with how this one turned out. 


Share in the comments what is your favorite flower.

Supplies Used:
Stamps - Papertrey Ink Orchid Expression
Inks- Altenew Fresh Dye Inks ( I did not keep track of which colors but any of their inks would be great for this set)
Die - My Favorite Things A2 Stitched Rectangle STAX set 1
Paper - Hammermill 80lb cardstock, Simon Says Stamp Black cardstock, Neenah 110lb cardstock
Misc - Misti Stamp Positioner, ATG Adhesive Tape

Sunday, May 11, 2025

Altenew Inspiration Challenge May 2025

Disclosure: This post may contain affiliate links, meaning if you decide to make a purchase via my links, I may earn a commission at no additional cost to you.


I am really good at making cards but suck horribly at actually mailing cards. This year I was remiss and did not make a card for my mother-in-law for Mother's Day. When we spoke to her on Sunday she talked about how she has kept every card I have ever sent her and when I told her I didn't make any cards this year for Mother's Day she laughing said "she was giving me one week to get her card to her". My mother-in-law is definitely a character. So in an effort not to disappoint her I made her a Mother's Day card and she will get it within the week.


Using the colors from Rebecca's photo in this month color challenge I started with the flowers. I die cut several of the flowers and one of the stems from Altenew Craft-A-Flower: Orchid Layering Dies using white Hammermill 100 lb. cardstock that I purchased on Amazon. Then I used Altenew Fresh Dye Inks from the Cherry Blossom and Pocketful of Sunshine sets to ink blend the flowers before assembling them.

The blue cardstock piece used for grounding the flowers is cut from Altenew Iceberg cardstock using Mama Elephant's Deckled Frames die set. Once I started assembling the card the background of the card base was way too plain and unfinished looking so I grab Altenew's Organic Linen embossing folder and embossed the front of the card base. I love this embossing folder! I then used some Dr. PH Martin's Bleed Proof White to do some splatters before adhering the sentiment with foam.


Shockingly I discovered that I do not own a stamp that says "Happy Mother's Day" so I had to get creative and print out the sentiment on my printer. 

Supplies Used:
Altenew Fresh Dye Ink - Cherry Blossom and Pocketful of Sunshine
Altenew Cardstock - Iceberg and Grass Field
Neenah 110 lb cardstock and Hammermill 100 lb cardstock

Wednesday, April 30, 2025

Altenew April 2025 Inspiration Challenge


My first time trying the monthly inspiration challenge at Altenew and I am sliding in just under the gun on this one. Note to self...do the challenges at the first of the month.🤣

Here is my card for the April 2025 Inspiration Challenge 


When I saw Amy's photo I knew that the Altenew Mixed Foliage layering set was perfect for this challenge. I started out die cutting the Mixed Foliage flowers and leaves in Neenah white cardstock. I placed all of the die cut pieces on my Altenew 9x12 Sticky Mat to hold them in place while I added the ink blending.

Using the Altenew Small Blending Brushes I blended the flowers with Frosty Pink and Coral Berry from the Altenew Red Cosmos Fresh Dye Inks. For the flower centers I blended them using Toasted Mauve and Redwood from Altenew Woodland Escape Fresh Dye Inks. The leaves were then blended with Frayed Leaf and Frosted Glades from the Altenew Green Fields Fresh Dye Inks.


I die cut the hello sentiment from the Altenew Hello and Hugs Stamp & Die Bundle. The sentiment from the Hello and Hugs Stamp set was stamped on to the die cut in Versafine Clair Nocture ink. The small sentiment add-on is also from the Hello and Hugs Stamp set.

Using a 4.25" x 5.5" piece of Altenew Mountain Pine cardstock I embossed the panel with Altenew Connected 3D embossing folder so that I could bring in the darker background from Amy's photo.

This was fun and I will definitely have to do it again. Have you tried one of the inspiration challenges?


Monday, April 21, 2025

Mixed Media Class with Juliana and Mary

Disclosure: This post may contain affiliate links, meaning if you decide to make a purchase via my links, I may earn a commission at no additional cost to you.

Mixed Media class


I have a love-hate relationship with mixed media. I love the look you can get but I hate the mess I have to clean up. But I am trying to learn to let the hate part go and enjoy the creative process.In trying to fix my struggle with this medium, I try to do classes or follow videos.

These cards are from a class Juliana Michaels gave with Mary Polanco Designs.Well technically the backgrounds are from the class. Instead of saving them as references as Juliana suggested I turned mine into cards right away. 


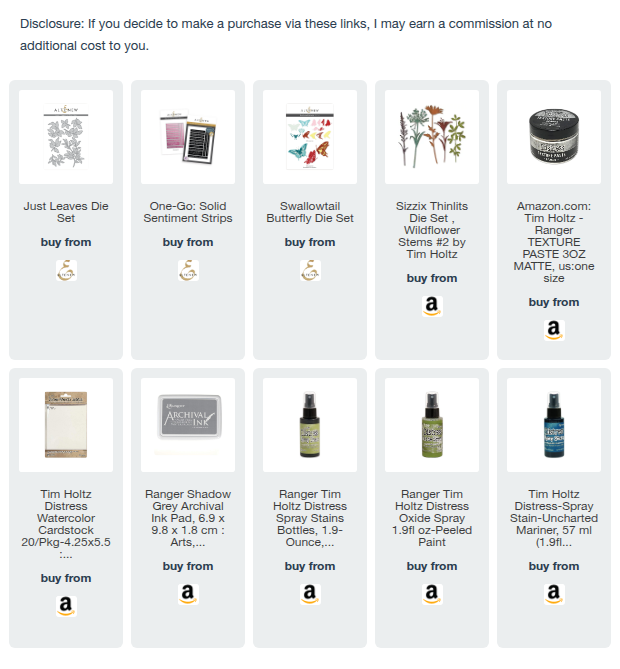
The butterflies on these 2 cards are from the Altenew Swallowtail Butterfly die set. I only used 2 of the layers to create these butterflies. That is the plus to layering dies, you do not always have to use all of the layers so you can get many different looks. The bottom layer is cut from heavy vellum and the top layer I cut from watercolor paper and then sprayed it with Distress Stain Sprays.


For the background stamping we used 4 different types of ink. This class was all about seeing what happens with you spray Distress Stain and Distress Oxide sprays over the different types of end. Even though I have had & used the different types of ink many time over the years I have not played around with them to see how they react with sprays.


For these 2 I just used large sentiment dies to create sentiments and simply placed them on the card fronts. Super simple but the size and color of the sentiments give it a little something extra.


For these 2 I used the same leaf die from Altenew's Just Leaves die set but changed up the look and feel of them by using different colors of cardstock to cut them. 


In addition to the stamping and the distress sprays we also used stencils with Ranger's Texture Paste and gave the panels more texture and dimension. This is a technique that I really need to use more often.


For these last 2 cards I did more die cutting, this time using the Sizzix Wildflower Stems #2 by Tim Holtz. I love the look of silhouettes and these dies are the perfect thing to accomplish that look. 

Do you create mixed media or are you like me and have a love-hate relationship with this medium?

Sunday, March 2, 2025

Artists' Watercolor 101

Disclosure: This post may contain affiliate links, meaning if you decide to make a purchase via my links, I may earn a commission at no additional cost to you.

So here I am at my last level 3 AECP class. For someone who does not know how to watercolor, I have a ridiculous amount of watercolor paints from several different companies. Watercolor painting is something that I would love to learn but not something that I have spent a lot of time with. So this is why I decided to do the Artists' Watercolor 101 class taught by Emily Midgett.

Emily does a good job teaching the basics of watercolor in this class. She went over the basics  of paints, tools, and techniques of basic watercolor making easy for beginners to understand. Emily explains wet-to-dry, diluted, color movement, wet on wet, color layering and ombre` backgrounds in this class and gives examples of each. 


This is a good way to get familiar with how the paints react. She also showed us how to get a good feel for the opacity of the paints using a glazing chart.


Without further ado here are 2 of the cards I made following Emily's instructions for this class.

Card 1 


For this card the image was heat embossed using Altenew Obsidian Pigment ink and Crystal Clear embossing powder. This card uses just basic watercoloring technique to give the image depth and dimension. Heat embossing the image creates a "well" for the water and paint to stay inside making it easier to control.

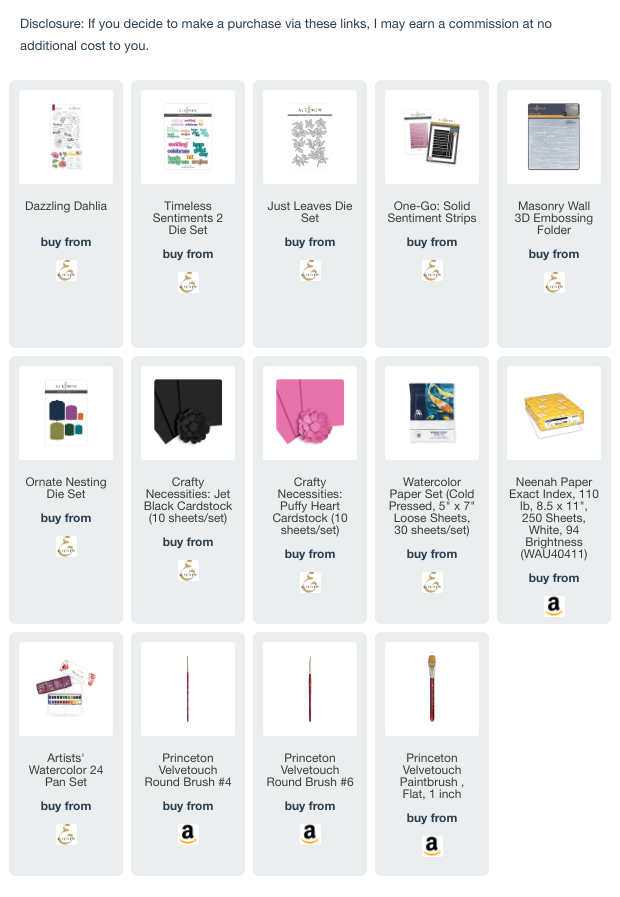
I then used Altenew Ornate nesting die to cut a base in Altenew Jet Black cardstock for the stamp image to have a grounding place. After playing around with placement I decided the background needed more color, so I embossed a 4.25"x5.5" piece of Altenew Puffy Heart cardstock with Altenew's Masonry Wall 3D embossing folder. 


SUPPLIES USED
Stamps: Altenew Dazzling Dahlia stamps and dies
Dies & Plates: Altenew One Go: Sentiment Strips press plate, Altenew Ornate nesting die
Misc: Altenew Masonry Wall embossing folder, Altenew Artist Watercolor palette, #4 & #6 Watercolor Brushes
Paper: Altenew Watercolor paper cold press, Altenew cardstock, Neenah cardstock

Card 2


Card 2 uses an ombre` background technique. I have seen so many do this type of background but had not tried it for myself. I love this technique and plan on using it often. It is fairly simple although I can see that I need quite a bit of practice to get a better transition in my colors.

For this technique the watercolor paper was taped to a hardboard and then using Altenew watercolor paint and a large brush you just paint in stripes across the cardstock gradually bring the colors together as you move along. 

You should try to use colors that are close on the ROY G BIV spectrum and you need to be mindful of color theory mixing so that you do not end up with a muddy mixture. 

You can leave it taped to the board and allow it to dry, which helps to stop warping or you can dry it with your heat tool to speed up the process.

Once the background was dry, I used Altenew Just Leaves die to cut a leaf bunch with Altenew Jet Black cardstock and Altenew Timeless Sentiments 2 die to cut 2 of the sentiment for layering to give the card some dimension. The background panel was adhered to a card base and the dies were adhered using Bearly Arts Liquid Glue. 


SUPPLIES USED
Dies: Altenew Timeless Sentiments 2, Altenew Just Leaves
Paper: Altenew Watercolor, Altenew cardstock, Neenah cardstock
Misc: Altenew Artist Watercolor palette, #12 Watercolor Brush

Monday, February 24, 2025

Background Magic

In the Background Magic class, Laurel Beard taught a number of different techniques to create backgrounds for cards using large background stamps. From inking to watercolor to heat embossing. This class has me wanting to pull out my large background stamps and spend a day or two just creating backgrounds with them using the techniques from the class. 

The techniques in this class can be used for so many different themes by just changing up the colors or sentiments.

Cards 1 & 2 - Inking Techniques

For these panels we inked directly on to the Altenew Watercolor Dots stamps set using different color inks and then stamped the image on a cardstock panel. You can get a different look to the panels by spritzing on some water before stamping the image down. The water helps the inks create a watercolor effect.


For the first 2 cards I just inked directly onto the stamp with different Altenew Fresh Dye ink cubes and then stamped the image on a piece of cardstock. The one on the left I used just 2 color families to create and the one on the right I followed Laurel's color choices. While both panels are pretty the one on the right has much more interest and texture due to the colors of ink used being in different color families.


For both cards I used sentiments from Altenew One-Go: Solid Sentiment Strips press plate. I am loving this press plate and how the sentiments look. The panels were trimmed down and layered on to cardstock layers before being adhered to the card fronts.

Card 3 - Inking Techniques Watercolor


For this card we used the same technique of stamping various colors of Altenew Fresh Dye ink cubes on to the stamp and then lightly spritzed the stamp with water before stamping the image on to a piece of watercolor paper. I then die cut the Altenew Circle Greetings: Hugs die three times and used liquid glue to layer them for added dimension to the sentiment.
 
Card 4 - Inking Techniques Heat Embossing


To create this card panel, the same Altenew Watercolor Dots stamp set was stamped on to a black piece of cardstock with white pigment ink. Pigment ink take a while to dry so you can use a heat tool to dry the ink faster. Once the dots were dry, we then took embossing ink and embossed the additional small images randomly on top of the dots using Altenew Antique Gold embossing powder. Then layered the card panel on a piece of Altenew Gold Metallic cardstock before adhering it on to a card front.


TIP: You must make sure that your pigment ink is completely dry before doing additional stamping on top of the pigment ink otherwise the powder will stick to the pigment ink too.
 
Card 5 - Partial Heat Embossing


This card was create using Altenew Rustic Linen background stamp. You could just ink up the whole stamp with embossing ink and it would be perfectly lovely. However, for this card we randomly tapped the embossing ink pad on to the stamp leaving only part of the stamp inked before stamping on to the cardstock panel. We then heat embossed the image with Altenew Antique Gold embossing powder. 


This technique gives you a different look every time since the ink is randomly applied each time.

Cards 6 & 7 - Watercolor Techniques

One of Laurel's design suggestions was to stamp your image and heat emboss it. Then turning your card base 90 degrees and repeating the stamping & embossing a second time to give you more options with your backgrounds.


The card on the left used Laurel's suggestion of double stamping the design by turning your panel 90 degrees. You can see what a difference you can get. Both of these cards were created using the same background stamp. I used a second piece of watercolor paper to "clean" the extra inks off of my glass mat giving me 2 more panels to use at a later time.


Left card - After stamping and embossing a watercolor panel with white embossing powder, I tapped the Altenew Fresh Dye ink cubes on to my glass mat, spritzed them with water and dipped the card panel into the color. I dipped it several times always drying with my heat tool between each layer of ink. Once the ink was dry, I stamped a sentiment from Altenew's Classic Greetings set on to a piece of vellum using Versamark ink and then heat embossed it with black embossing powder. After allowing the embossing powder to cool I used some Scarpbook.com Clear Double-sided Adhesive on the back of the vellum to adhere it to the card panel. The panel was then layered on to a black cardstock panel and then adhered to a card base.

Right card - I again stamped a piece of watercolor paper with Altenew Pattern Play - Diamonds stamp set and heat embossed it in white. I then spritzed the panel with water and sprinkled on some Lindy's Magical powders. Spritzing with more water to break up the powder and get the colors to move on the paper. Using my heat tool, I dried the panel and dipped it a few more times to get more texture to the image.  For the sentiment panel I used 2 sentiments from Altenew Cascading Flowers and a leaf image from Altenew Garden Bouquet stamping them in embossing ink and heat embossing with white embossing powder.


SUPPLIES USED
Press Plate - One-Go: Solid Sentiment Strips
Stamps - Altenew Watercolor Dots, Altenew Rustic Linen, Altenew Pattern Play - Diamonds, Altenew Classic Greetings, Altenew Garden Bouquet, Altenew Cascading Flowers
Dies - Altenew Circled Greetings: Hugs Die
Inks - Altenew Fresh Dye ink cubes, Versamark, Hero Arts white pigment ink
Paper - Altenew cardstock, Hammermill cardstock, Ranger Distress watercolor
Misc - Altenew Antique Gold embossing powder, Brutus Monroe Alabaster & Raven embossing powder, Lindy's Magical powder (Danny Zuko's Denim, Lucky Shamrock Green, Every Picture Teals a Story)